Skip to: Assembly | Installing the Python library | The Matrix Program
The matrix uses cheap WS2811 addressable LEDs. I've provided full build instructions and a public domain program which you can use or adapt to control it. The program takes PNG images as input, and by default scrolls the images right to left, ideal for scrolling text. However, each image file can also be accompanied by a text file giving instructions to change the speed, freeze-frame portions of the image, or animate frames like a flip-book.
It's Chriiiiiiist-maaas! Here's a demo of the matrix showing a Christmas theme. The sequence scrolls reindeer and Santa's sleigh, a bit of text, a chain of baubles, an animated snowflake, some Christmas presents and a couple of Christmas trees.
My artistic skills are fairly limited, but the great thing is that you can easily create your own scrolls or animations. My program will render any image, but it's best to create a PNG file that's 8 pixels high. You can use any graphics editor such as GIMP or MTPaint. You can make the image as wide as you like and it'll scroll it right to left. Later on, I'll show you how to add instructions to change the speed, freeze-frame or animate parts of the image.
The matrix rolls up for easy portability - it'll fit in the boot of a small hatchback quite easily.
And here's Hallowe'en. An animated pumpkin, some text and a scrolling graveyard.
I had four LEDs spare so I put them in pumpkins and had another Raspberry Pi control them using the same program (effectively a 4-wide x 1-high matrix).
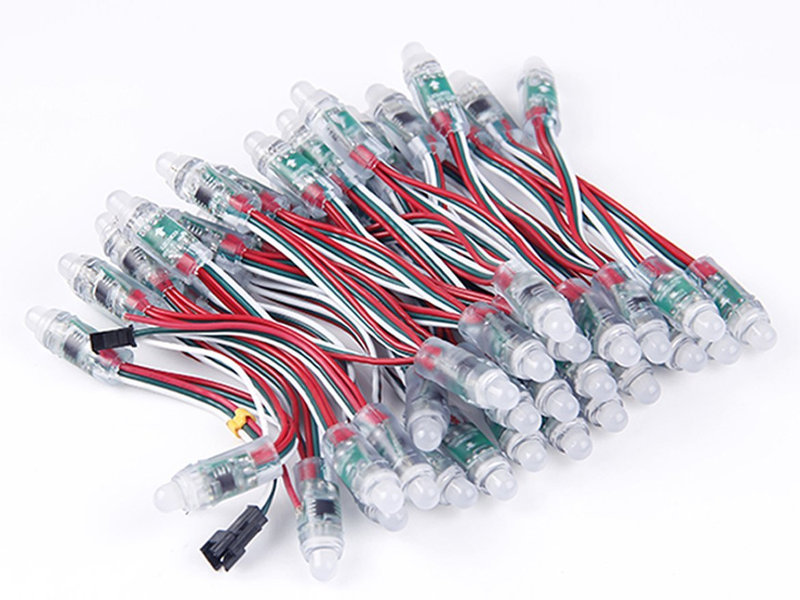
Let's buy some LEDs! I bought two strings of fifty WS2811 LEDs at £12 per string (x2=£24) from Amazon UK. Buy now using this link and the affiliate profit goes to Cotswold Raspberry Jam to buy equipment to teach children to code. Alternatively you can source your string of LEDs from anywhere provided they are WS2811 LEDs. WS2811 is a driver chip for multicoloured LED lights. The wonderful Adafruit company refer to them as "Neopixels". You can buy them in strips, or individually, but for this tutorial you'll need a string of them. You can easily join two strings (or almost any number of WS2811 LEDs) in sequence.
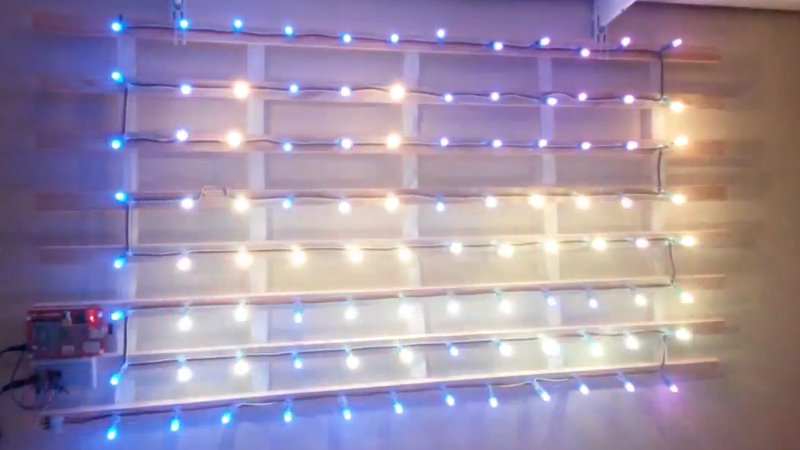
I arranged my LEDs as 8 rows of 12 LEDs each - that's 96 LEDs. You'll have four spare you can cut off and use for other projects.
When you receive your LEDs, you can either start stapling them to the grid straight away, or you can follow this Adafruit tutorial to run a string test.
You can join the two strings of LEDs together simply using a "chocolate block" screw terminal.
Having children dance around the lights is optional, but having them do so to the tune of the Wicker Man's "Summer Is A-Cumin In" is highly recommended. The LEDs are weatherproof and encased in a hard-wearing semi-flexible plastic, but even so, your kids probably shouldn't tread on them.
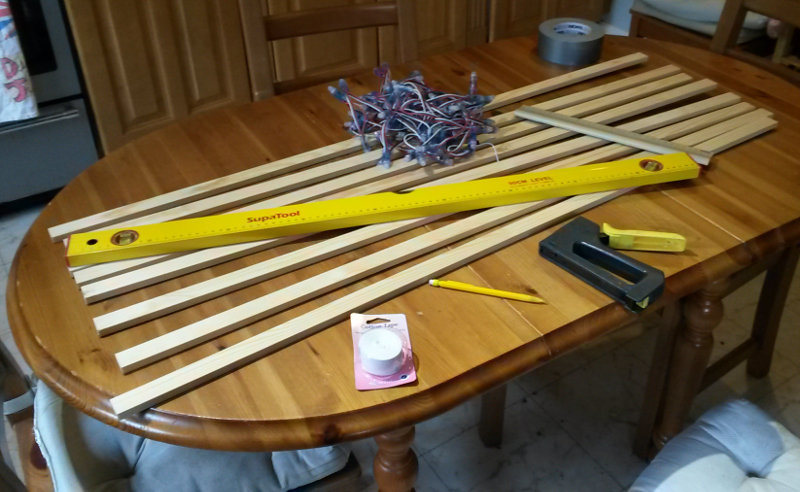
Next you'll need 8 wooden batons to mount the LEDs on. A cross-section of 2x1cm will be fine. I used untreated wood, but in retrospect I should have got it with a weatherproof treatment. Most larger DIY stores will supply wooden batons and cut them to size for you. The LEDs were 8.5cm apart on my string, and there are 12 per row, so I had the batons cut to 120cm to give me a fair bit of space at each end. If portability is important, measure whatever you're going to cart it about in (e.g. your car boot) and consider cutting the batons as short as 100cm.
You'll also need:
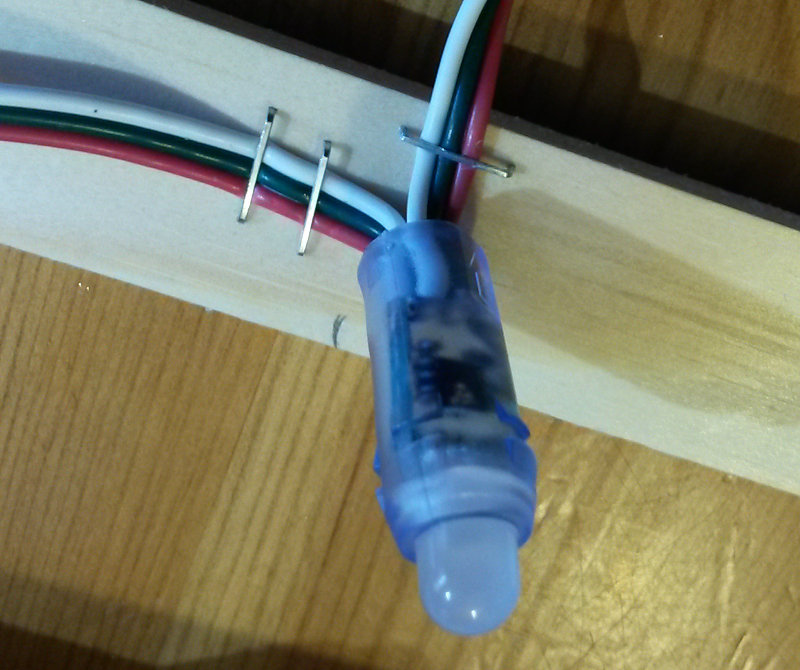
With programmable LEDs, it really, really matters which is the "start" end, the end with the "first" LED. Identifying the "start" of the string can be tricky, as both ends can look similar. Peer closely into the fitting of each LED, though, and you'll see some arrows (you may need a magnifying glass). The "start" of the string has the wires entering it with "up" arrows heading to the inside of the LED. These arrows really matter, so pay attention. Unlike the Doctor, you cannot reverse the polarity; LEDs are Light Emitting Diodes, and "diodes" only accept electricity in one direction.
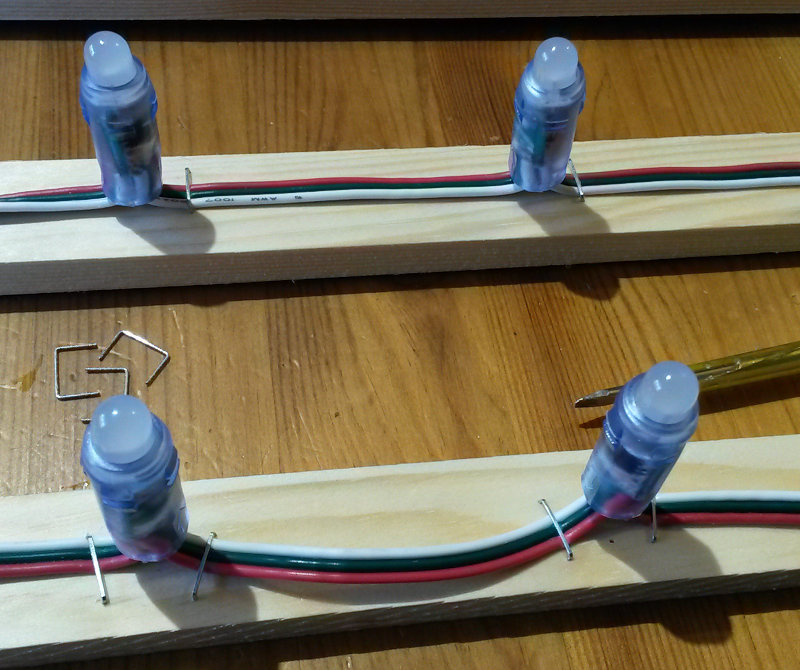
Use the staple gun to put a staple immediately before and immediately after each LED. Use the ruler to make sure each LED is the same distance apart - and that they are parallel with LEDs on other batons. Don't assume the wire is exactly tyhe same length between each LED; it is often several millimetres out.
I started my LED string at the left of the bottom baton, and worked my way snake-like across, up, back, and up again along each baton. Here you can see the final LED on the bottom baton, with the wire heading up to the right-hand end of the second-from-bottom baton.
Use a ruler and multiple strips of duct tape to measure and temporarily hold the batons perfectly parallel. The centre of each baton should be the same distance apart as each of your LEDs.
That said, don't try to be millimetre-precise. This is a low-resolution grid that will only really be effective from a distance of 10-30 metres, so nobody is going to notice if a couple of LEDs are a little bit out of position.
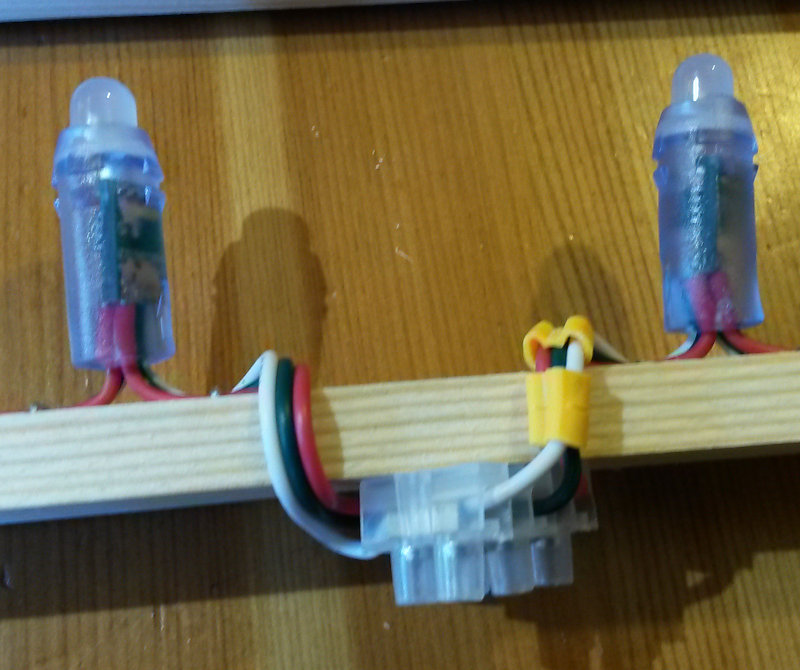
50 LEDs in, and you'll need to join the first string to the second string. I used a bit of screw teminal / chocolate block. You can use amalgamating tape to make this more weatherproof afterwards, but there are limits to the waterproofness of this kind of electrical join. Fill any gaps with bathroom sealant or encase the whole block in Sugru to increase weatherproofing. (Hey, Sugru, please donate some of your lovely stuff to Cotswold Raspberry Jam - email andrew@aoakley.com )

Likewise, a chocolate block screw terminal should be affixed to the starting LED, to make it easier to attach jumper wires.
After 96 LEDs, you'll have your 12x8 matrix. Cut off the final 4 LEDs (you can use them in other projects - they'll still work).

Now carefully staple the cotton webbing tape into vertical strips on the back of the batons. If you used duct tape to ensure the batons were held equidistant apart, keep the duct tape in place until you're sure the cotton tape is correctly positioned and affixed. Use a nice-year-old girl called Annabel to hold the batons apart taught, while you staple the cotton tape - or, if you're feeling adventurous, let the nine-year-old do the stapling whilst you hold the batons. Remove the duct tape and hold the matrix up - does it look straight?
You might wonder if it's better to staple the tape before the LEDs. The answer to that question is no, because the LEDs aren't guaranteed to be a set distance apart - it'll vary slightly with each string.

Hang your matrix up and check that it looks roughly level. Remember, we're not going for millimetre precision - just close enough that it looks okay from across the road.
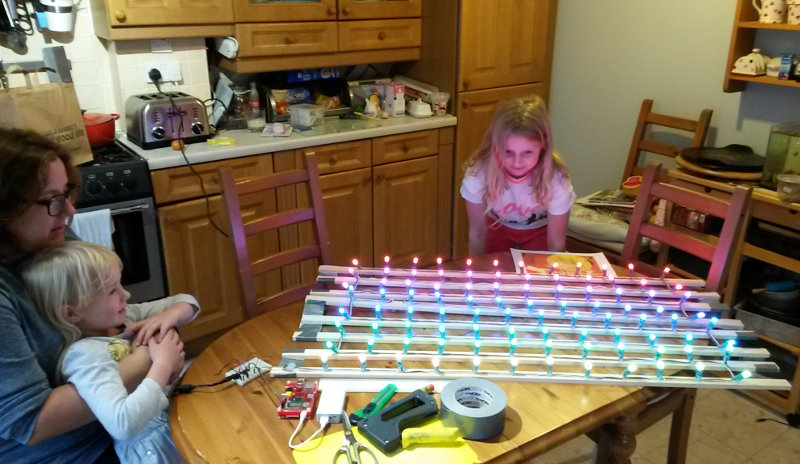
Impress your family with LED rainbow goodness! You'll need to read on through the next section to learn how to control it from your Raspberry Pi first, though.
For this bit, you'll need:
You will need a fairly beefy power supply for the LEDs. Each one consumes a maximum of 60 milliamps, so with 96 of them you're looking at nigh on 6 amps. If your power supply looks less like the thing you plug in to your Raspberry Pi, and more like a laptop power brick, then you're on the right lines. I used a YU0510 5v 10 amp PSU (link profit to Cotswold Jam) for which you'll have to find your own IEC kettle lead (I have dozens lying around from old PCs, YMMV; in particular, if you plan to put the PSU in a weatherproof box, you'll probably want a really short IEC lead - they're available as short as 50cm). Although in theory I could backpower the Raspberry Pi from the big power supply, in reality I found it wasn't stable enough, so I used a separate 2a power supply for the Pi. The YU0510 works great with the lights though. For the 2.1mm barrel jack adaptor to connect a typical power supply to the breadboard, you can use Adafruit item 368 or 373, check your RS/Farnell catalogue, or pop in to your local friendly Maplin. Note that 2.5mm and 2.1mm barrel jacks are usually interchangable.
The level shifter is the interesting bit. The WS2811 LEDs use a 5-volt signal to understand which LEDs should turn on, and what colour. Unfortunately the Raspberry Pi's GPIO pins use 3.3 volts. A level shifter is a microchip that's used to boost 3.3 volts to 5 volts.
There are two main types of level shifter chip. You can buy the Texas Instruments 74AHCT125 chip, which is sold under the US Adafruit brand in the UK by the lovely people over at Makersify. Alternatively, you can buy a bidirectional level shifter such as the TXB0108, which again is sold under the Adafruit brand in the UK by perpetual Pi favourites Pimoroni. No affiliate links there, so if those firms would like to donate some Pi-related booty to Cotswold Raspberry Jam, my email's andrew@aoakley.com - thanks!
My preference was for the 74AHCT125 chip, as it was the one featured in the Adafruit tutorial.
Speaking of the Adafruit tutorial, there's no point me re-inventing the wheel by telling you how to wire all this up, compile and install the rpi_ws281x Python libraries. Follow Adafruit's tutorial here:
learn.adafruit.com/neopixels-on-raspberry-pi
You need to be able to run the stringtest.py program which is included in the rpi_ws281x archive. Once you've got that working, you're ready to try out my program which displays pictures on your matrix.
Skip to the chase - here's my program:

As well as the rpi_ws281x library, you will need to install Python imaging:
sudo apt-get install python-imaging
You can use the program as follows:
sudo python ledmatrix.py christmas.png
...where:
The program should be adaptable to a matrix of any size. In theory. Do let me know how you get on, if you try that.
You can provide an accompanying .txt file that provides instructions on how the image should be animated. This is optional; the default action is to scroll from right to left. The .txt file must otherwise have the same name as the image file; for example, christmas.txt is the name of the .txt file that accompanies christmas.png .
Here are the commands that are understood in the .txt file:
You can create images in any bitmap graphics editor, such as GIMP (advanced, Photoshop-like) or MT Paint (easier to use). For fonts, I highly recommend the following 8-bit fonts:
DaFont.com have a number of other bitmap fonts, but you'll need to check that they're 8 pixels high to suit this matrix best.
This tutorial, my program and the sample files are Public Domain, except for the bits that belong to Adafruit (the LED string tutorial) or Jeremy Garff (the rpi_ws281x library). This means you can pretty much do what you like with the files, so long as you credit Adafruit and Jeremy Garff. You don't need to credit me, but it would be nice if you could give Cotswold Raspberry Jam a plug: www.cotswoldjam.org
Public Domain - Andrew Oakley - 2015-11-23